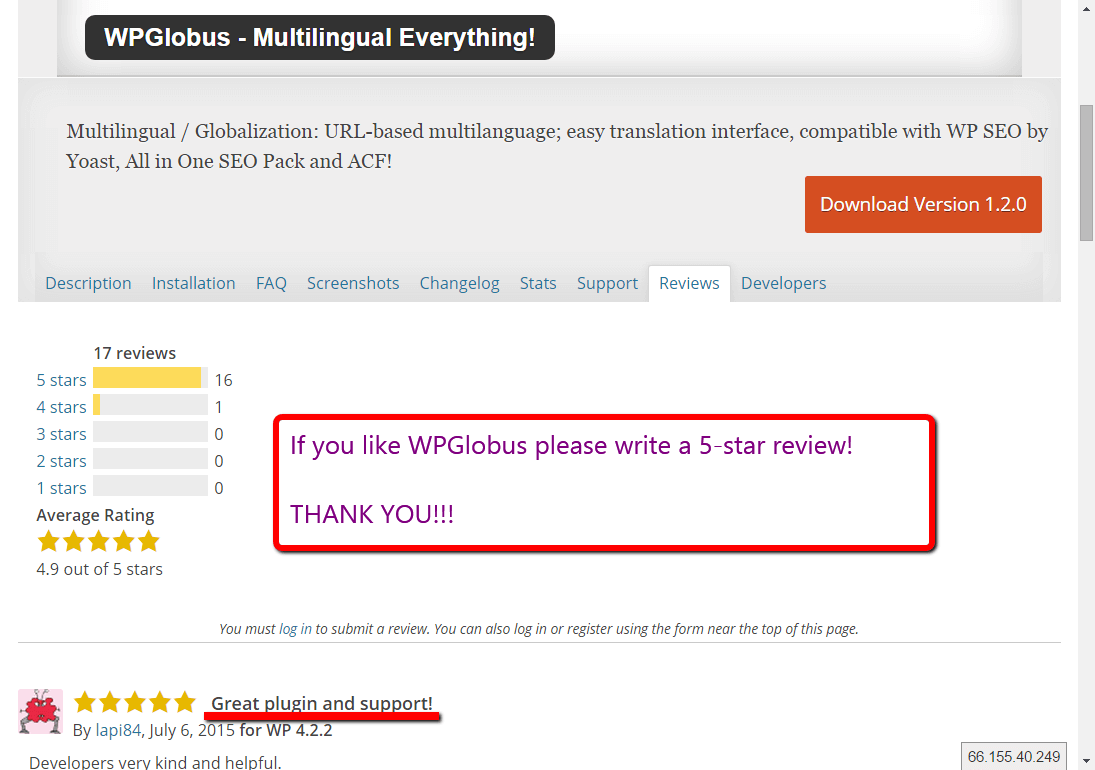
The Welcome Screen
After you installed and activated the WPGlobus – Multilingual Everything! plugin, you will see the “About WPGlobus” screen.
Usually, it will contain the regular “Welcome” information. If we need to notify you about some breaking changes, we’ll post a warning message there.
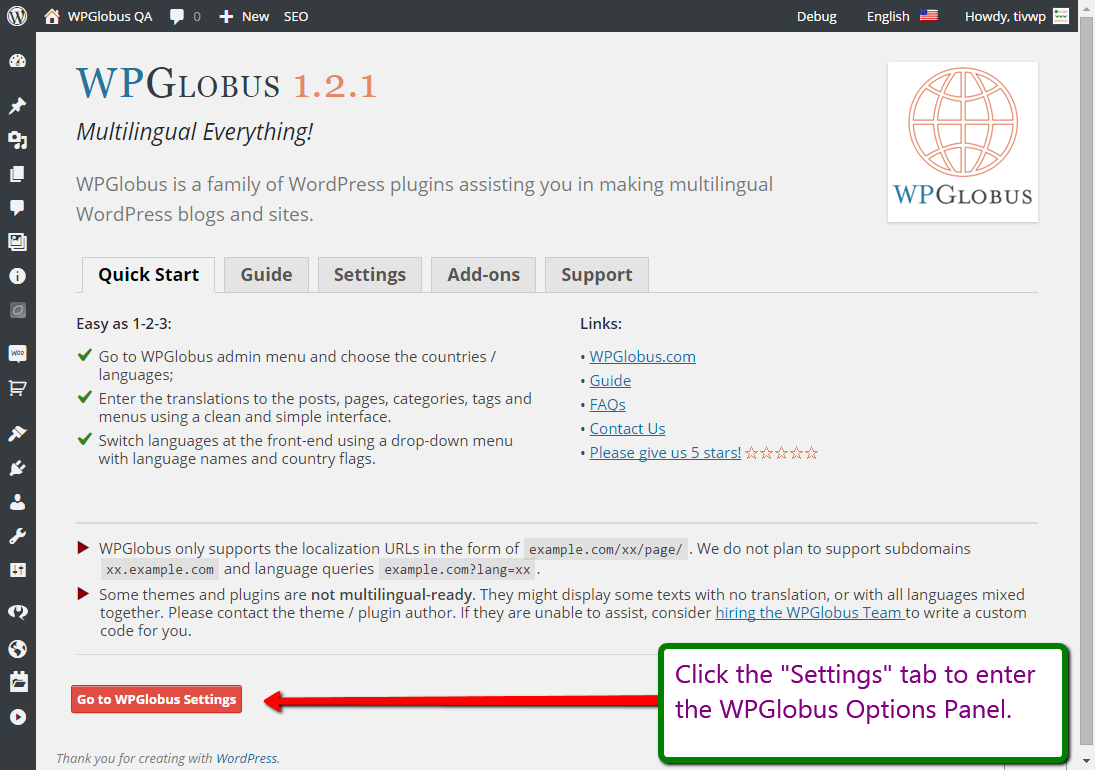
If you see this screen, WPGlobus is up and running. Now, please click the “Settings” tab to continue.
Pic.1
The Options Panel
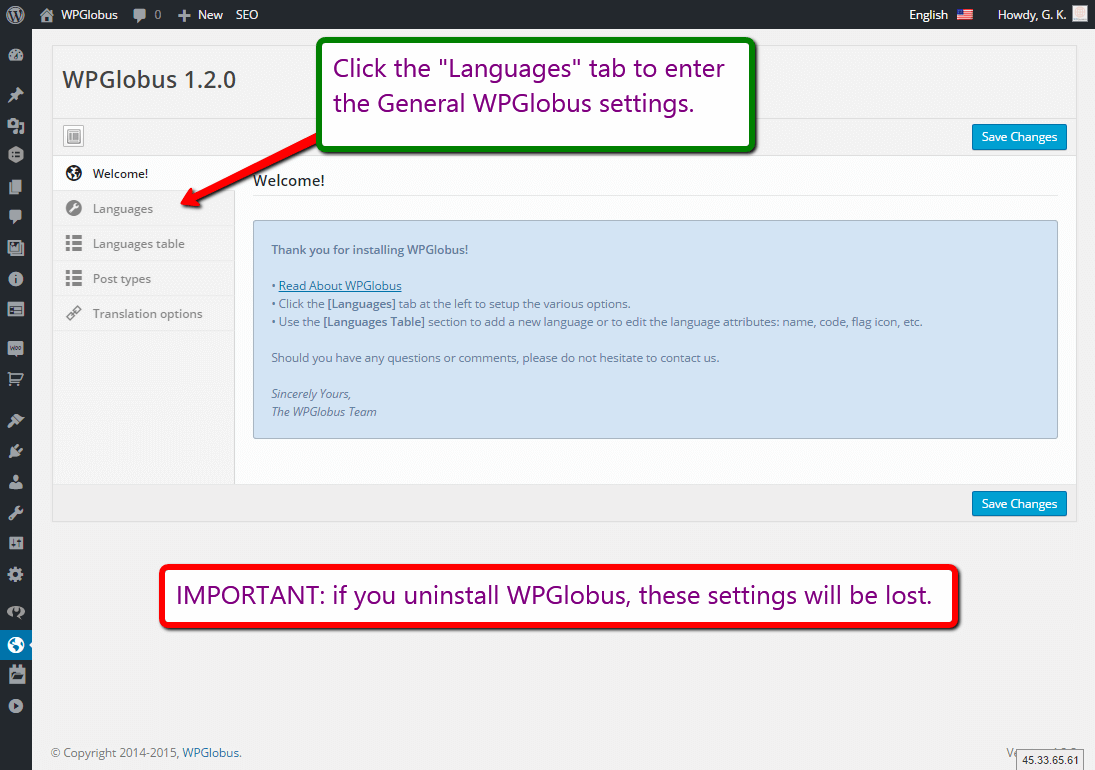
The WPGlobus options panel is easy to use. Do not forget to click the “Save Changes” button after you modify something.
Please note that if you decide to deactivate and delete the plugin, all the settings will be lost.
We’d also like you to know that WPGlobus stores all texts, originals, and translations, in the same place, formatted in a special way. When the plugin is deactivated, all languages will be mixed together on the screen.
If you decide to uninstall WPGlobus, you must use our Clean-up Tool. It will remove content in all languages except for the main one.
Pic.2
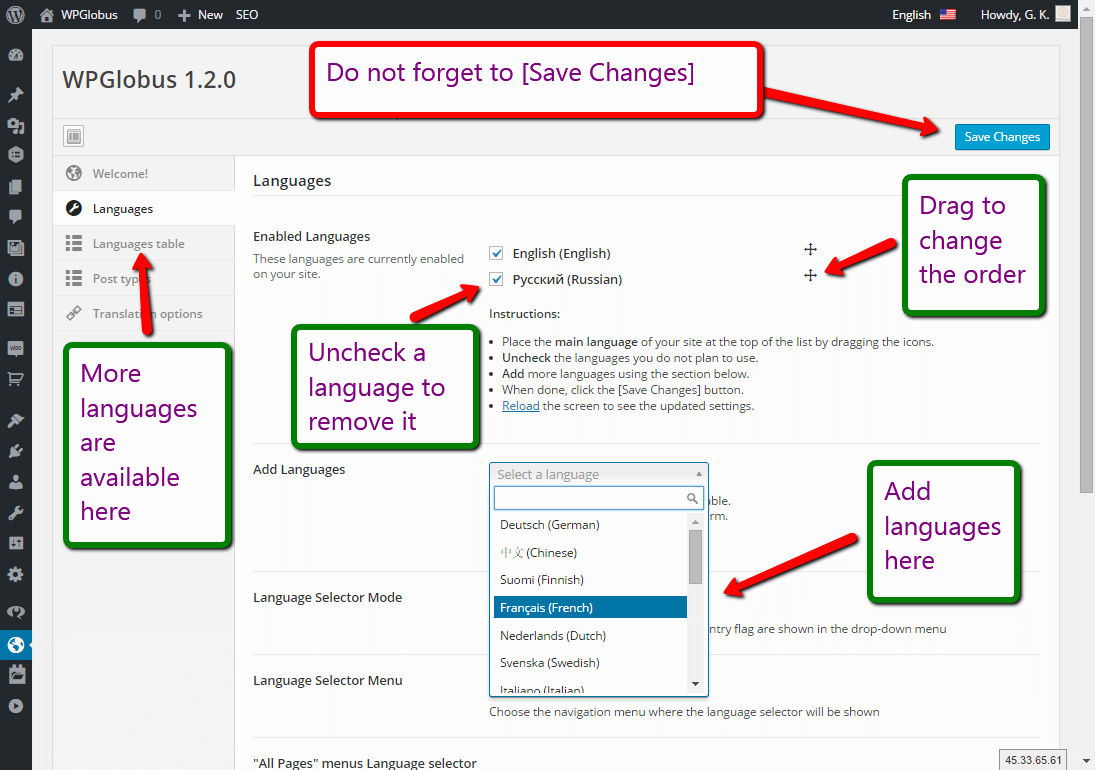
The Languages Tab
Here you can add, remove and rearrange the languages. Please see the screenshot for visual instructions.
There are more languages defined in the “Languages Table”. Go there to chose the flag, name and locale for the language you need.
Pic.3
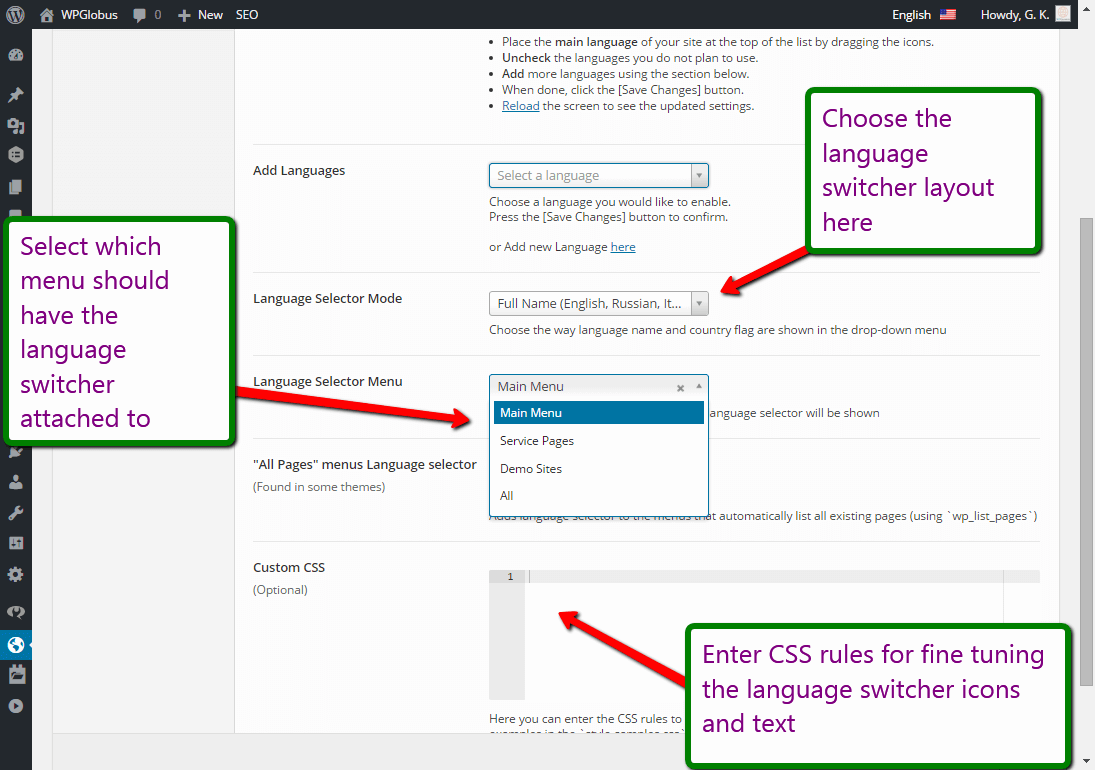
There are additional settings on the same tab related to the language switcher location and cosmetics.
Pic.5
Multilingual Editing
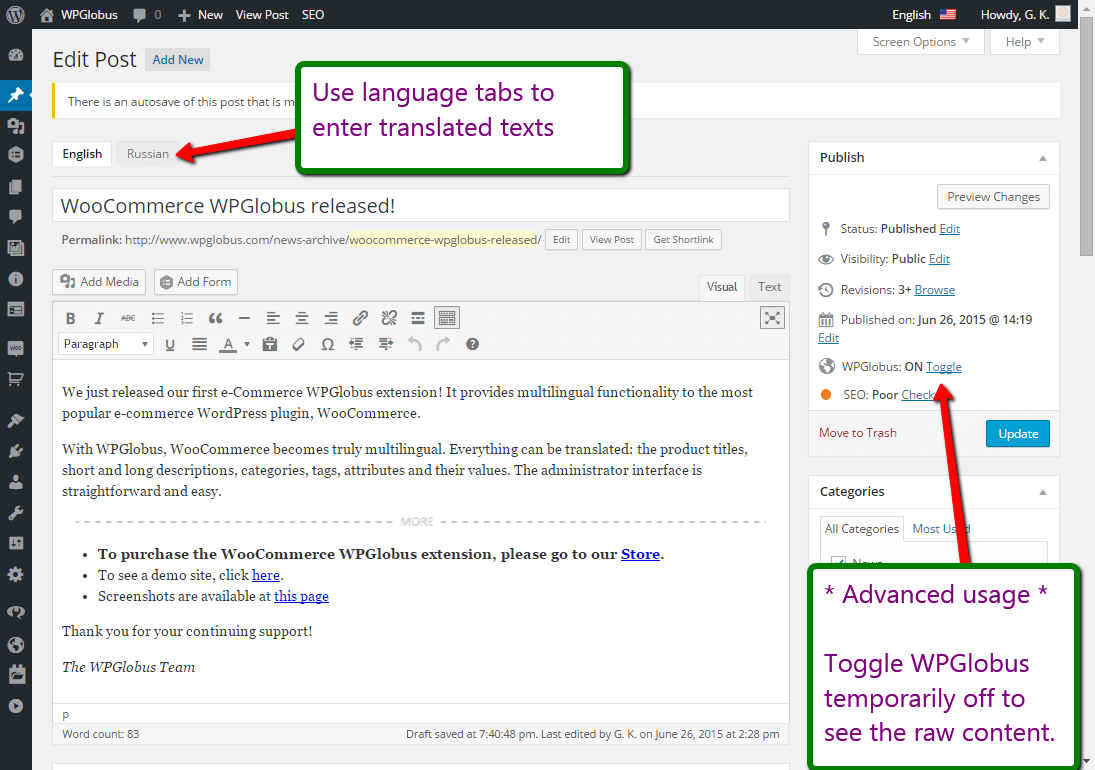
Once you are done with the basic setup, you are able to edit posts, pages, categories, tags, menus and widgets – in multiple languages.
Pic.6
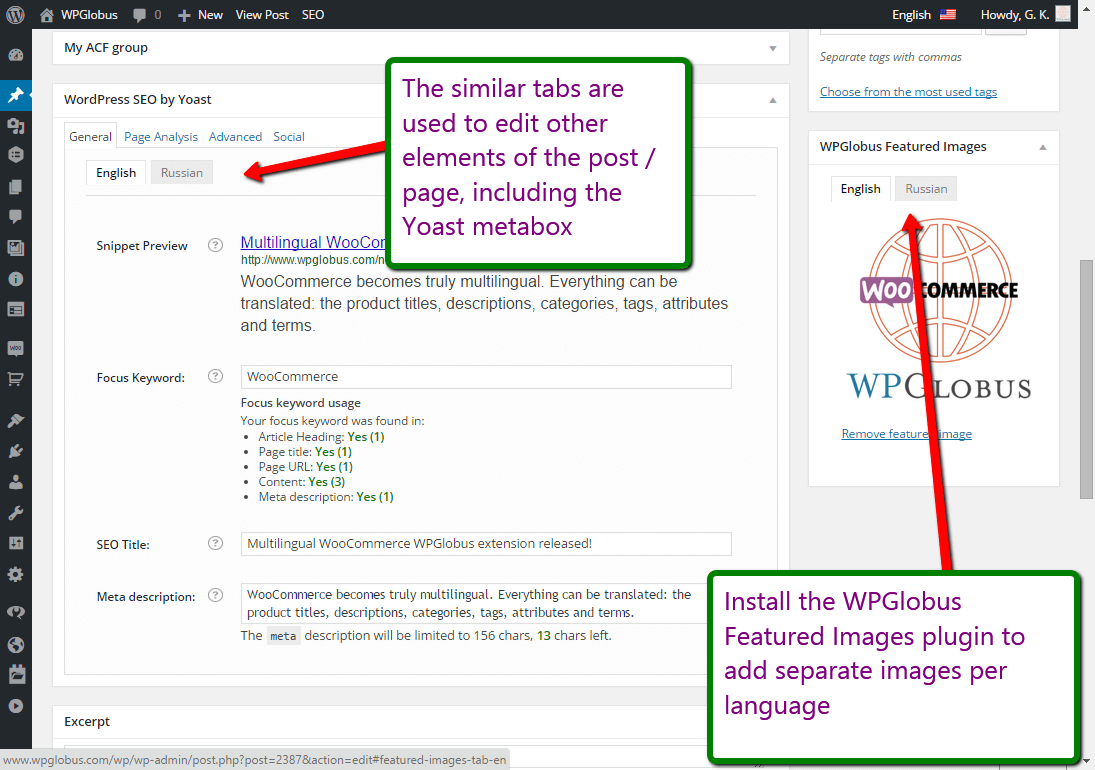
Major plugins like WP SEO, ACF, WooCommerce *) – are supported. You can edit their content the same way you edit regular post titles and descriptions.
Pic.7
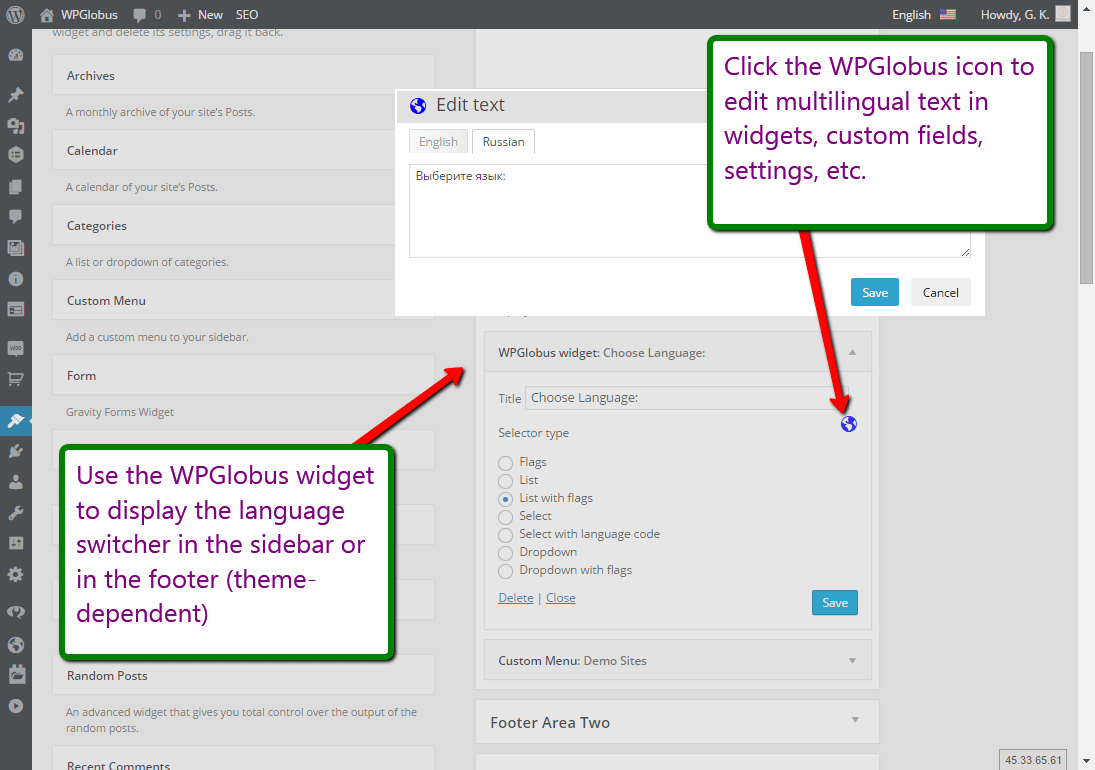
In the widgets, settings and custom fields, to edit the multiple languages, you’ll need to click on the WPGlobus icon.
Pic.8
Thank you!
We hope our work saved you a lot of time and that you enjoy using the WPGlobus plugin.
We appreciate if you leave us a 5-star review, and especially if you donate a small amount, which we’ll use for the further development.

